
This quickstart takes you from a fresh install to picking and packing your
first order in about fifteen minutes. It deliberately skips every advanced
feature — you’ll create one user, one login code, and run a single order
shipment through the whole pipeline: prepare → totes → batch → pick →
pack.
You’ll need:
- Pack Perfect installed on your BigCommerce store.
- At least one order with the status Awaiting Fulfillment.
- A printer (for the batch page and its QR code).
- A barcode scanner is handy but optional — every scan step can also be
done by typing or clicking.
Step 1 — Create a warehouse user
Warehouse work is done by users, not your BigCommerce admin account.
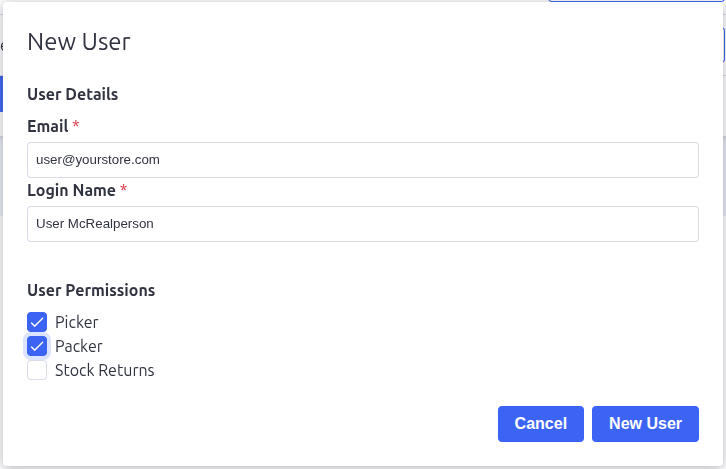
- From the Pack Perfect home page, open App Settings, then Users.
- Click New User.
- Enter an Email and a Login Name — the login name is what you’ll
type into the warehouse app, so keep it short. - Tick Picker and Packer so this one user can do both jobs.
- Click New User to save.
Step 2 — Create a warehouse login code
A login code ties the warehouse session to your store and location. You’ll
enter it once when logging into the warehouse app.
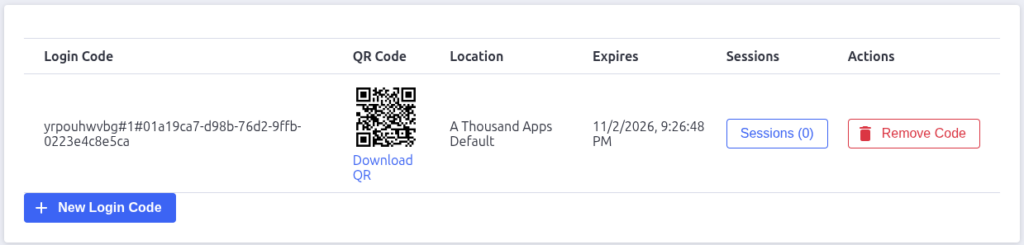
- Go to App Settings → Warehouse Login Codes.
- Click New Login Code, leave the expiry at the default, and confirm.
- The new code appears in the table with a QR image — copy the code text
or keep this tab open so you can scan the QR later.
Step 3 — Prepare your order shipments
“Preparing” pulls your awaiting-fulfillment orders into Pack Perfect.
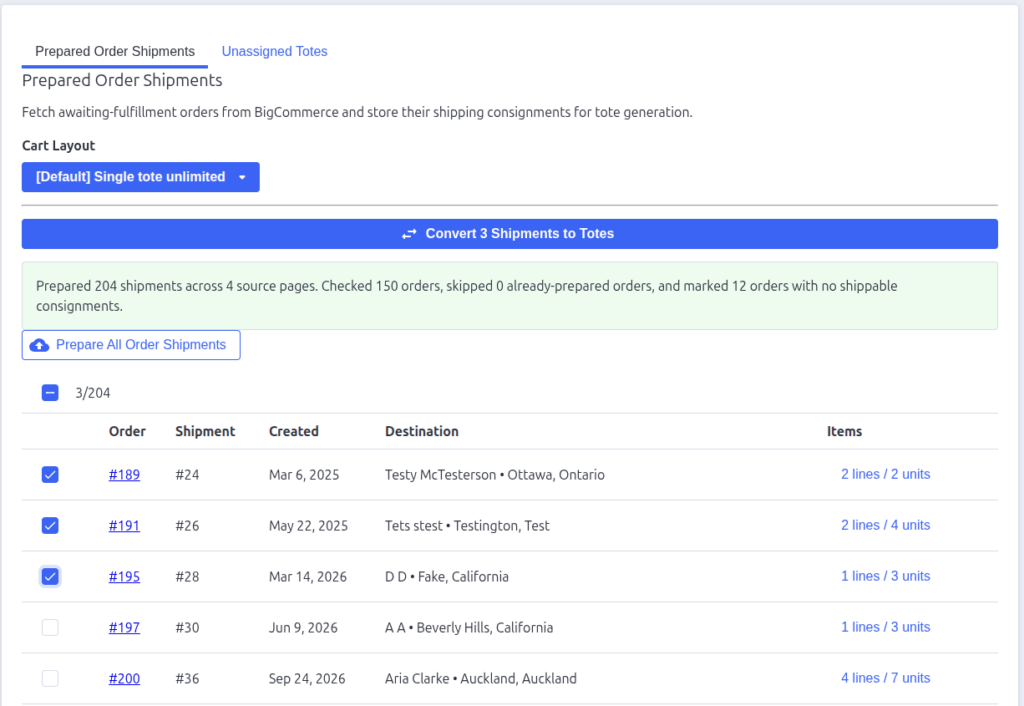
- Open Convert Order Shipments from the home page.
- Click Prepare All Order Shipments and wait for the green summary —
every shipping consignment on an awaiting-fulfillment order becomes a
prepared shipment in the table.
Step 4 — Convert one shipment to a tote
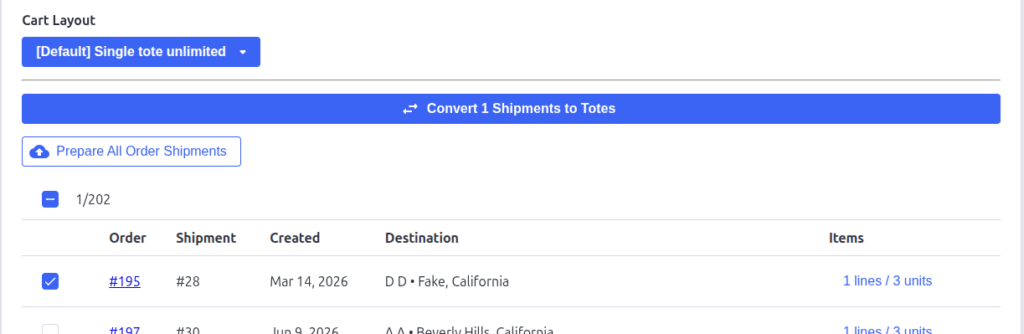
Leave the Cart Layout dropdown on [Default] Single tote unlimited.
The built-in layout puts each shipment into a single tote with no item
limits — ideal for a first run.
- In the prepared shipments table, uncheck every row except one — pick
a small shipment. - Click Convert 1 Shipments to Totes (the button shows how many rows
are selected). - You’re taken to the Unassigned Totes tab, where your new tote is
listed.
Step 5 — Create a batch
A batch is the unit of work a picker takes onto the floor.
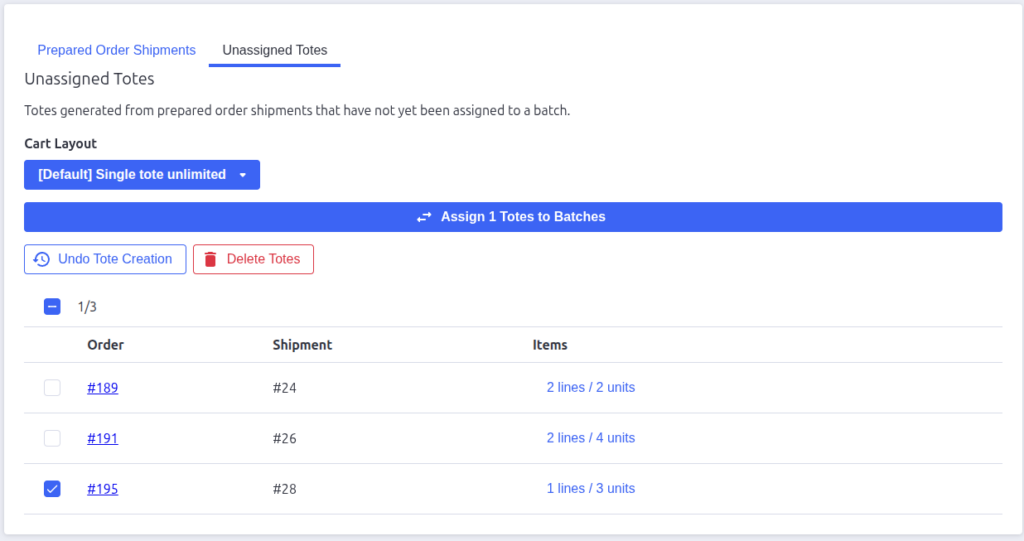
- On the Unassigned Totes tab, check your tote.
- Click Assign 1 Totes to Batches.
- The success message links to Active Batches, where your new batch
shows the status Prepared.
Step 6 — Print the batch page
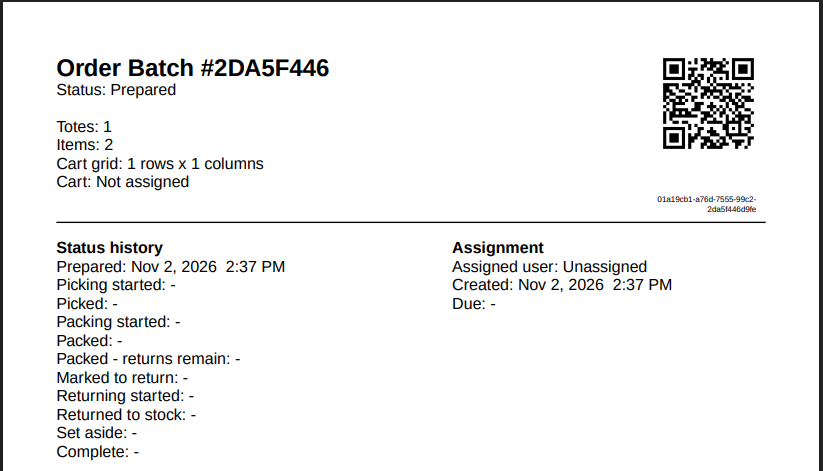
The batch PDF’s first page has a QR code that the warehouse app can use as the
cart ID — print it now so it’s waiting on the picking cart.
- Open Active Batches.
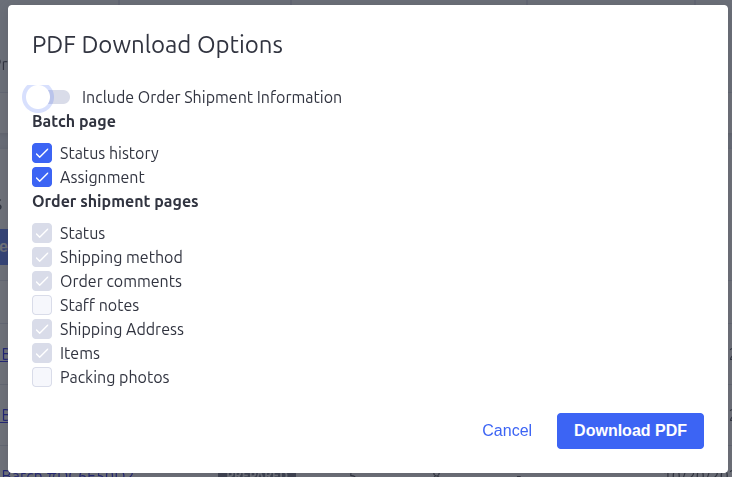
- Click Download Prepared Batches PDF.
- In the options dialog, turn off Include Order Shipment Information —
you only need the batch summary page for this run. - Click Download PDF, open the file, and print at least the first page.
Clip it to your picking cart.
Step 7 — Log into the warehouse app
- Back on the Pack Perfect home page, open Warehouse App and click
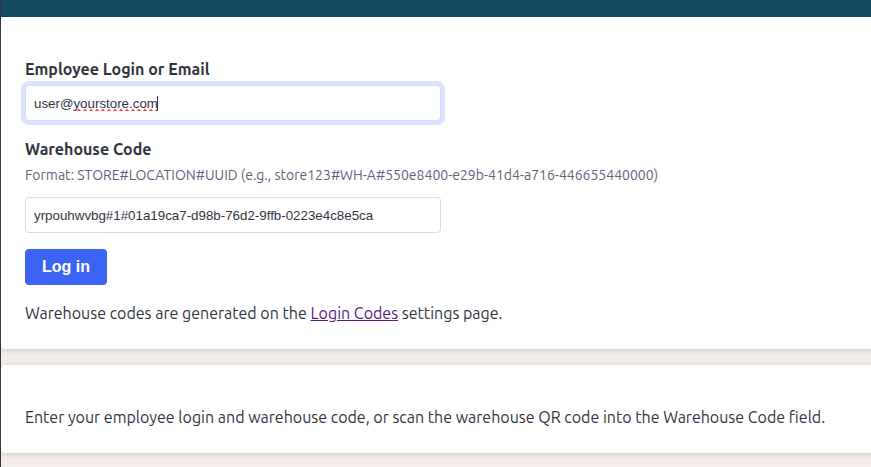
Continue to Web Version. - On the login screen, enter:
- Employee Login or Email — the login name from Step 1.
- Warehouse Code — the code from Step 2. Scanning the code’s QR
image into this field works too.
- Click Log in. You’ll land in the warehouse app — the Picking tab
is where your batch is waiting.
Step 8 — Pick the batch
- On the Picking tab, click your batch card.
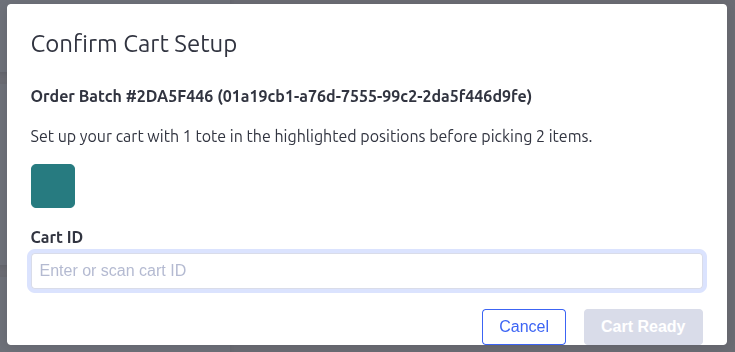
- The Confirm Cart Setup dialog shows which cart positions hold totes —
put the tote on your cart, then enter the Cart ID: scan the QR code
on the batch page you printed, straight into the Cart ID field. - Click Cart Ready — you’re picking.
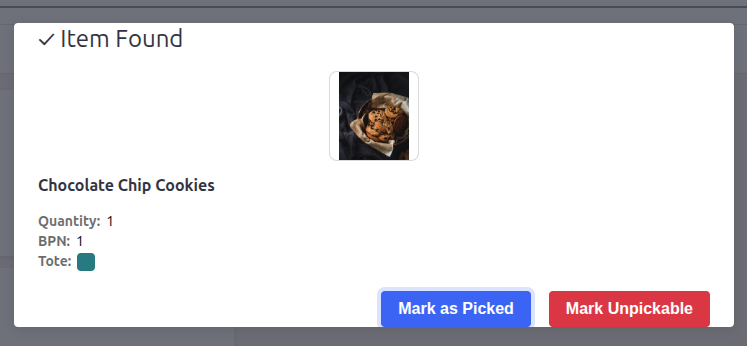
- Click the barcode field (“Click to focus, then scan barcode”) and scan
the first item’s SKU or UPC barcode. A popup shows the item and its
tote position — grab it from the shelf, drop it in the tote, and click
Mark as Picked. No scanner? Click the item in the list and confirm
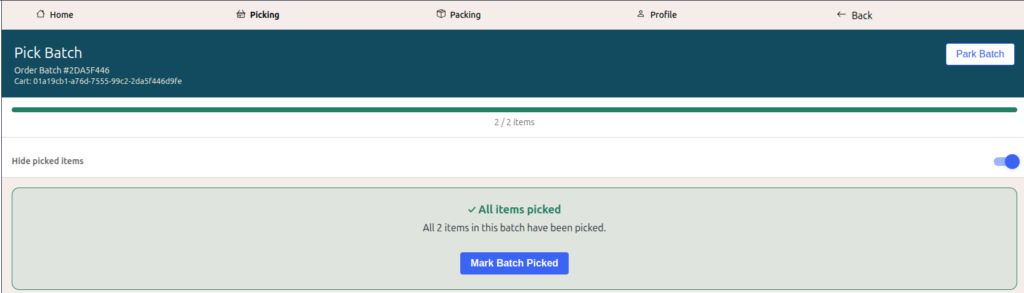
instead. - Repeat for every item — the progress bar counts you down, and picked
items are checked off the list.
- When the last item is done you’ll see All items picked. Click
Mark Batch Picked and confirm — the batch moves to the packing
queue.
Step 9 — Pack the tote
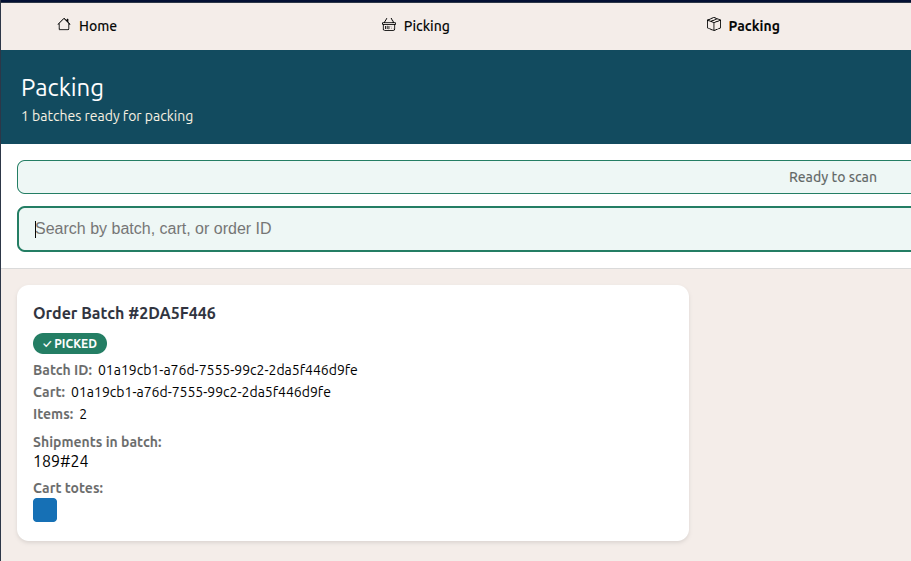
- Switch to the Packing tab and click your batch — it now shows the
Picked status. - The Start Packing dialog asks you to confirm the cart is in front of
you. Click Start Packing. - Click the shipment card, and in the Confirm Totes dialog click
Totes Ready — you’ve pulled the tote off the cart to pack it.
- On the packing screen, check off each item as you put it in the box —
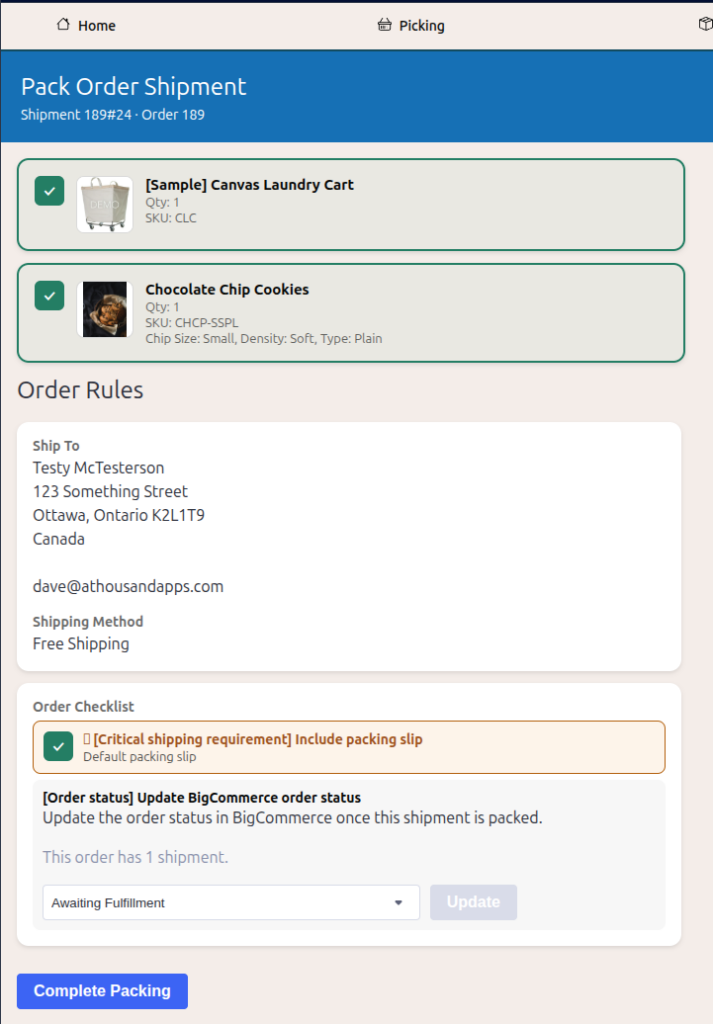
scan its barcode and confirm, or click the item’s checkbox. - With every item checked, the Order Rules section appears showing the
ship-to address. Click Complete Packing. - Back on the Pack Batch screen, click Complete Batch and confirm.
That’s it — the batch is Complete. Your first order went through the
full pipeline: shipment → tote → batch → picked → packed. You can see it on
the Completed Batches page.
Where to go from here
This was the minimal path. When you’re ready to scale up, these features
are waiting:
- More staff — create a user per employee and control who can pick,
pack, or process returns with per-user permissions. See Warehouse
Users. - Fresh login codes — regenerate and print QR codes for each shift or
posting spot. See Warehouse Login Codes. - Bigger carts — define layouts that match your real picking carts so a
batch can span many totes, and shipments split across them automatically.
See Cart Layouts and The Cart Layout Form. - Batching at volume — convert many shipments at once, watch for layout
blockers, and undo tote creation when plans change. See Converting Order
Shipments to Totes. - Packing rules — enforce per-product, per-variant, per-category, or
per-order requirements: required scans, photos of the packed box,
shipping-method checks, order-status updates. See Packing Rules and
The Packing Rule Form. - Live tracking — watch every batch move through its statuses, see
who’s working on what, and dig into any batch’s full detail page. See
Active Batches and Batch Detail. - Returns to stock — when items can’t be packed, the returns workflow
tracks them back to the shelf. See Completed Batches. - The mobile app — the same warehouse app runs on phones and tablets. See The Warehouse App.
- Audit trail — every action is logged for 90 days. See History.
- Fine-tuning — PDF page size, default cart layout, BPN separator, and
automatic order-status updates live under App Settings.

Pack Perfect
Pack Perfect is coming soon! Email support@athousandapps.com to be added to the list and we’ll let you know as soon as it’s released.